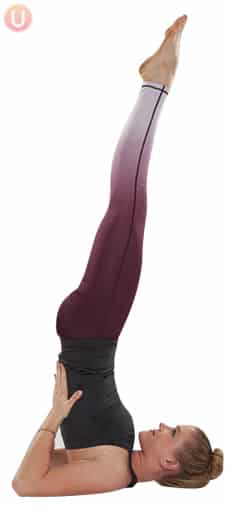
How To Do Shoulder Stand Pose
Shoulder stand is an inversion pose that most people, with a bit of practice, can learn to achieve. Simply put, inversion poses are those that put your lower body above your upper body. These inversion poses are practiced because they are a great way to reinvigorate your circulatory system and give you new and fun challenges to try. Certain inversions can also be great for decompressing your spine.
So how do you know if you are ready to learn how to do shoulder stand pose or other inversion poses? Truthfully, almost everyone can perform an inversion pose of some type. How advanced you take your inversion poses will depend on the success you have in the simpler inversions. For instance, if you can do Legs Up The Wall Pose successfully, you might be ready to move to a Shoulder Stand Pose. Once this is something you have achieved you might be ready to move to a Plough Pose. The point is, move gradually and slowly through poses that are achievable for you, knowing your history or injuries, and recognizing any limitations you might have. Safety is first. According to Yoga Journal, do not practice deeper inversions if you have any cervical disc problem, cardiovascular issues, type 2 Diabetes or are in the later term of a pregnancy.
If you are healthy and geared up for the shoulder stand, be sure to lift your body weight from your core. Don’t just wing your feet into the air. Follow instructions step by step. Once in the shoulder stand keep your head in the same position- do not turn it to either side. Also, relax your chin toward your chest and relax the back of your neck. The body should stay lifted from the core strength so try to take the weight off your hands and lift it upward.
1) Begin lying on your back with legs extended straight up in the air above hips. Keep feet together.
2) Placing hands against lower back, engage abdominals and begin lifting legs into the air while supporting lower back with your hands.
3) Relax neck throughout.
