This post contains affiliate links. Please see our disclosure policy.
Are you a kombucha drinker? Maybe you’ve seen it at the grocery store but haven’t taken the plunge yet or maybe you’ve tried it before without totally knowing what it is. Or perhaps you’re like us and are borderline obsessed with the effervescent tonic and want a refresher on all the wonderful things it does for your body!
Wherever you fall on the kombucha-loving spectrum, this article will clear the air. We’ll explore what kombucha is, how kombucha is made, the health benefits of drinking kombucha, and how to make your own kombucha at home.

Save This Article To Read Later
What Is Kombucha And How Is It Made?
Kombucha is a fermented drink of sweetened black or green tea. It’s fermented using a symbiotic colony of bacteria and yeast that forms a gelatinous membrane called a “SCOBY”or “mother” for it’s ability to reproduce smaller cultures. It’s not a sugary beverage, since the yeast culture consumes most of the sugar during the fermentation process. Each serving of kombucha usually contains only one or two grams of sugar. Since it is fermented, it does contain a trace amount of alcohol (0.5%) but it is not an alcoholic beverage.
What Are The Health Benefits of Kombucha?
Why do people drink kombucha, you ask? Kombucha has numerous health benefits, namely its ability to promote gut health, which research continuously suggests is correlated to your overall health. Check out some of the main health benefits of drinking kombucha.
1. Helps Your Digestive System
Like other fermented foods (think Greek yogurt or saurkraut for example) Kombucha is full of enzymes and probiotic cultures that regulate intestinal flora and help maintain a healthy balance of bacteria in the gut. Drinking kombucha on a regular basis can aid in digestion and also keep acid reflux, constipation, and other digestive problems at bay. (Psst: want healthier cocktail options? Check out our Healthy Cocktail Cookbook below complete with some kombucha cocktails!)
2. Naturally Detoxifies & Alkalizes Your Body
The gluconic acids in kombucha aid in daily detoxification by binding to toxins and drawing them out through the urine. Kombucha is also alkalizing for the body. Why does this matter? Many of the foods we eat, such as processed foods, dairy, eggs, and meat create acidity in the body. Even if you don’t eat these foods (some of which are actually healthy), emotional stress, and even immune reactions can cause acidity in the body. Kombucha helps to combat that acidity by alkalizing the body and creating a healthy pH balance in the body. A healthy pH balance can help discourage cancer and other generative diseases.
3. Provides A Natural Energy Boost
Kombucha is made from black or green tea, so you get a little caffeine boost with every bottle. It won’t make you hyperactive or anything (it certainly doesn’t have as much caffeine as a cup of coffee or an energy drink) but many people find it perks them up and improves their mental clarity. When you don’t want to reach for that lunch time cup of coffee, kombucha is a healthy alterative that won’t give you the jitters.
Related: 11 Natural Stimulants Better For You Than Energy Drinks
4. Curbs Your Appetite Between Meals

Kombucha is also great at curbing your appetite between meals. The acetic acid in kombucha has been shown to delay stomach emptying (so you stay fuller longer) when consumed before or with a meal. Plus, the bubbly nature of the drink and fun flavors make you feel like you’re having a soda or other libation when really, you’re drinking something much healthier!
5. Helps Your Hair, Skin, and Nails Look Their Best
People report faster hair and nail growth, which is likely the result of the glycuronic acid in kombucha, of which glucosamine is a by-product. Glucosamine is used in building collagen, an important component of healthy nails and hair. Anecdotally, people report improved skin elasticity, and reduction of wrinkles, acne, eczema, sunspots, brown spots, and more. The nucleic acid in kombucha aids in healthy cell regeneration, which contributes to glowing skin!
How To Make Your Own Kombucha
If you’re ready to make your own kombucha, congrats! You’ll have an affordable and healthy tonic at your fingertips whenever you want. The easiest way to have a continuous supply of kombucha is to do what’s called a “continuous brew.” To do this, you need to have a large brewing vessel that you’ll use to brew your batches as well as bottles for your finished product. Once you have fermented your tea the first time in your brewing vessel, you just have to bottle about 75% of the tea (leaving 25% as your new starter fluid) and then refill your vessel with fresh sweet tea. The fermentation process will begin again on it’s own!
What You’ll Need:

1. Starter fluid or a SCOBY
You definitely need starter fluid, but you don’t necessarily need a SCOBY. Many people prefer to use both, and some people claim this will help your first batch brew faster, but you can easily brew with just starter fluid and sweet tea. I did not start with a SCOBY; I personally got my starter fluid from a class I went to at Whole Foods. However, you can easily buy your starter fluid or SCOBY online. Cultures For Health is a well-known website where you can purchase everything you need to get started. You can also purchase starter kits on Amazon like this one from EverBru that come with most everything you need!

2. Brewing vessel
Your kombucha brewing vessel can be a ceramic or glass jar with a plastic spigot (you don’t want metal because of the acidity of the kombucha). Whatever vessel you choose, make sure that you fill it at least 75% of the way when brewing to avoid mold.
3. Breathable cover and a rubber band
This can be a paper towel, cheesecloth, coffee filter or towel depending on the size of your vessel. You will also need a rubber band to secure the cover to your vessel.
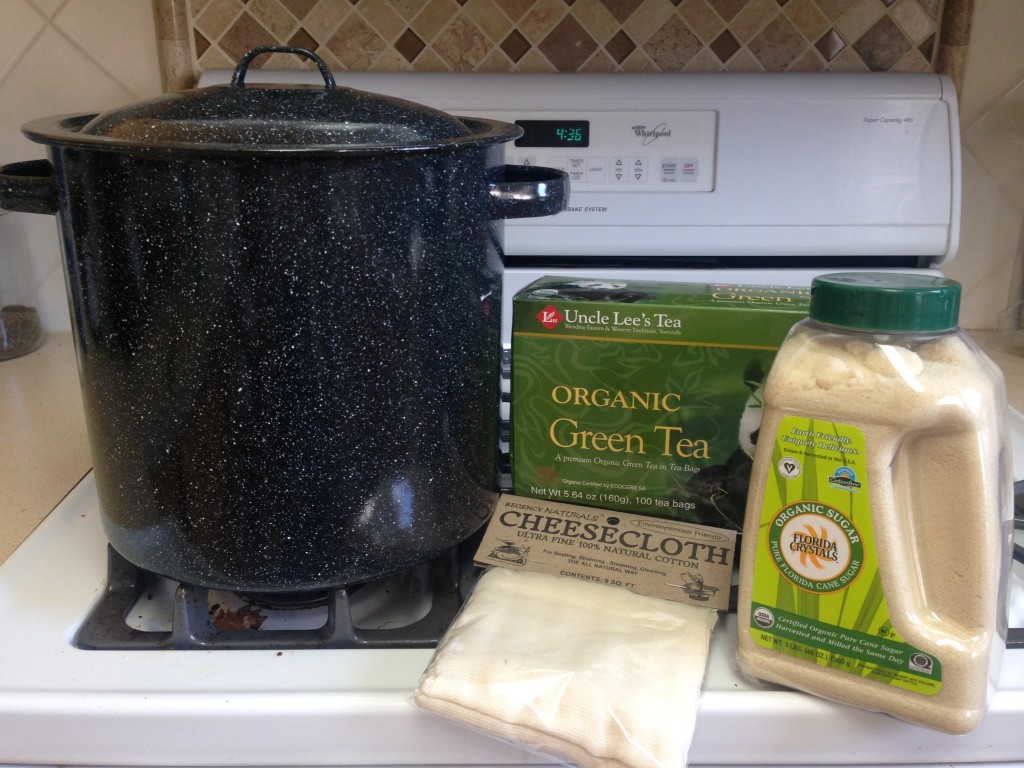
4. Large, non-reactive pot
Your pot can be clay, enamel, glass, plastic, or stainless steel. Reactive metals such as aluminum and copper react chemically with acidic foods and will give your kombucha an unappetizing metallic taste. You will need this to boil the two gallons of water to make your tea. Using filtered or spring water rather than tap will make your kombucha taste better.
5. Glass bottles
These are for bottling your finished product! Your glass bottles should have plastic caps that can be re-applied.
6. Organic black or green tea & cane sugar
This should be non-flavored because herbs and extracts can harm your SCOBY. This is for making your sweet tea.
7. Fresh fruit juice or herbs
This is for your second ferment and is optional. You can choose any juice if you want. I have tried many different ones, from citrus fruits like lemon and orange to pomegranate, blueberry, raspberry, or even strawberry basil or ginger pear. Any fruit juice or herb combination will work! Ginger is one of my favorite spices to add because it creates great flavor, supports digestion, and adds to the effervescence of the kombucha.
How To Brew Your Kombucha
Step 1:
Fill your non-reactive pot with two gallons of water and turn the stove on high.
Step 2:
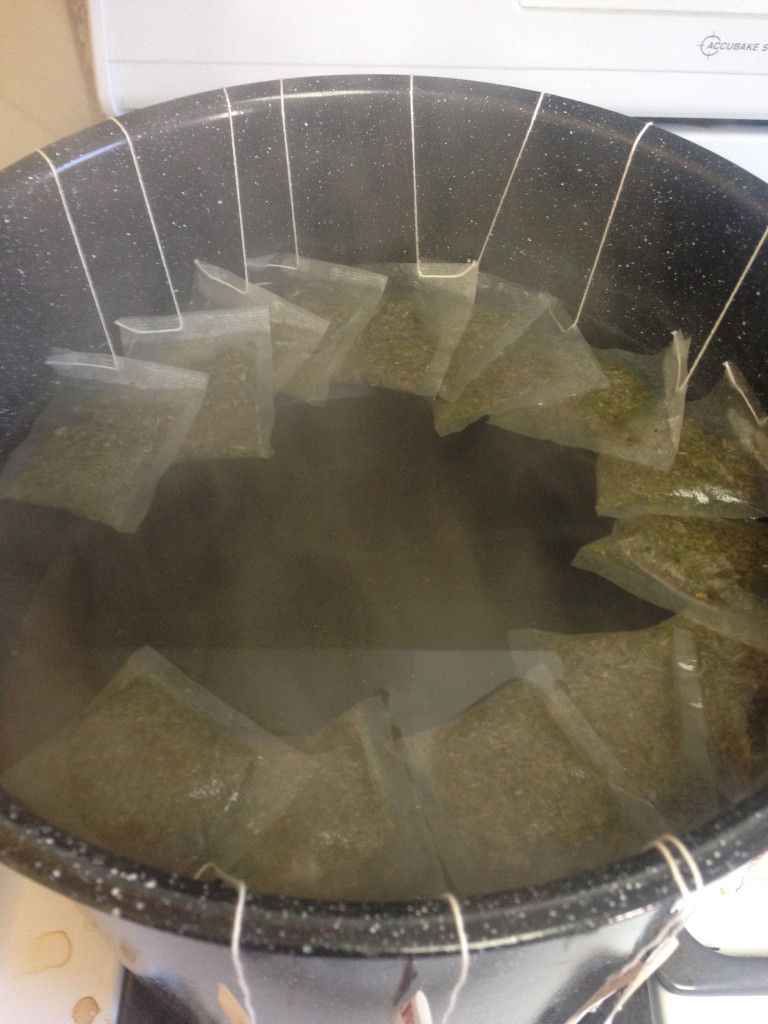
When the water comes to a boil, turn off the stove and add your tea. I usually add about 7-8 tea bags per gallon of water. Follow the brewing directions for your tea.

Step 3:
Remove your tea bags and add the sugar. I add about ¾-1 cup per gallon of water. Stir the sugar until it dissolves completely.
Step 4:
Let your tea cool to room temperature. When it’s cooled, add the sweet tea and starter liquid to your vessel. They should mix well on their own, but you can stir with a sanitized utensil if you want. If you are using a SCOBY, place it on top of the liquid. If it sinks to the bottom, that’s fine, it just means that it was a slightly different temperature than your tea. Once all your ingredients are in your vessel, cover the vessel with a clean cheesecloth or paper towel secured with a rubber band.
Step 5:
Let your tea sit undisturbed for about 7-14 days. The best way to determine when your kombucha is ready is to taste it. Everyone has different preferences, but in general, if you think it is too sweet, let it ferment longer. If you really want to be sure that your kombucha is perfect, buy pH test strips and make sure the pH is between 2.5 and 3.0.
Step 6:
Now comes the fun! When your kombucha reaches the tartness you desire, fill each of your bottles, leaving space for a few ounces of fruit juice if you want added flavor or effervescence. Make sure to leave at least 10-20% of your kombucha in the vessel as the starter for your next batch.
Step 7:
GET CREATIVE! Add a few ounces of any fruit juice or herbs you desire. Then decide if you want your kombucha to be effervescent. If you don’t, then put your bottle directly into the refrigerator. If you do, then let your bottle sit out with the cap on for 7 days to a few weeks. The time it takes to create effervescence will depend on the fruit juice that you use. Note: Make sure to briefly burp or release the cap of your bottles every few days so that pressure doesn’t build up and create a kombucha explosion!
Step 8:
Repeat! Every once in a while, you’ll want to remove part of your SCOBY from your vessel if it gets too large. In general, your SCOBY will take up the surface area of your vessel, and for the most efficient brewing it should not be more than a few inches thick. If you decide your SCOBY is too large, simply cut it apart. To do this, wash your hands very well and place the SCOBY in a clean bowl. Strip excess SCOBY away and return the remaining SCOBY to your vessel. You can give the part you stripped away to a friend to start their own batch.
So are you going to try it? If you do, please share with us how it goes!
PS: Want healthy cocktail recipes (including one for a delicious kombucha cocktail??) Get your free Healthy Cocktail Cookbook below!


More often than not dehydrated cultures will go to mold. Best to start with a living culture from a reputable source to ensure a lifetime of delicious Kombucha.
Totally confused. What is “starter fluid?” It is never defined. Purchased kombucha? What brand? How do you know it’s fermented? Bubblies?
Starter fluid – is the original brew that your scoby lives in. To start brewing, it is best to have at least 2 cups of starter brew….technically, you don’t need a scoby to start brewing, you need that original brew – that’s where the bacteria lives.
Kombucha is sold in quite a few stores now, so grab a bottle & taste it, then you will know what to aim for when you brew.
I would suggest that if someone is going to start brewing, find someone who has done it & ask questions, even get the scoby & initial tea from them. Go onto Facebook and join the Kombucha Krew (I think that’s what they’re called) – or any of the multitudes of brewing groups on f/b.
The only other advice I can give about brewing – don’t get caught up in the snobbery that is kombucha brewing…..some of those folks want you to use organic tea, picked by unicorns under the light of a full blood moon at some ridiculous amount per pound. If you will drink the tea, with the sugar, you can brew with it, unless it has flavouring or essential oils. You can brew with herbal tea, but it will take a whole lot longer – it’s something to do with the tanins – herbal doesn’t have them.
Also, if you are not concerned about organic, neither is your scoby.
A shortcut I use when brewing…..I heat up a cup worth of water and brew my tea in that – very concentrated. I then clear out the loose tea, pour cool water into my brew vessel and add my brew concentrate. That way, I don’t have to muck around waiting for gallons of water to cool – just a cup worth.
Can you put the scoby to “sleep” for a time period until you are ready to brew?
Hi Nancy – check this article out: http://www.phoenixhelix.com/2013/03/27/kombucha-tips-troubleshooting/
Can it be purchased?
Absolutely! Our team love GT Kombucha but there are many brands out there!
Thank you so much for including a video to go along with the recipe – it makes it super simple for visual learners to follow the process. I definitely want to try making this at home and appreciate your recipe! Can’t wait to try!
Show much kumbucha can you drink a day.
When you’re first starting, I’d recommend taking it slow. I drink a bottle of it a day but maybe start with 1/4 to a 1/2 a bottle and work your way up!
Can we use ginger bug for fluid starte
I have a scoby in my apple cider vinegar, can I use that as a starter?
Hi Susan – we haven’t tried that, but this article may be helpful for you: http://www.kombuchafuel.com/2010/10/kombucha-scobys-vs-mothers-of-vinegar.html