This post contains affiliate links. Please see our disclosure policy.

I can’t tell you how often people seem surprised that the yoga poses they’re in are making them sweat. A lot. They’re way less intense than a HIIT workout, and even in a non-heated room, people find that holding a warrior pose or a crescent lunge will make their legs shake and leave them dripping with sweat. Why? Because yoga is full of “isometric exercises,” or exercises that do not use movement to work. Let’s look at how isometric exercises can benefit your existing workout routine and make you stronger.
What Is An Isometric Exercise?
The dictionary defines isometric exercise as “a type of strength training in which the joint angle and muscle length do not change during contraction.” That’s a fancy way of saying that instead of moving the weight up and down or back and forth, you hold it in one spot. Instead of using joint movement, such as the elbow joint bending during a push-up, an isometric hold relies on equal forces working against one another.
For example, when performing a basic squat, you use the muscles in your glutes and legs to move your body up and down. The joint angle at your knee changes with each squat. Conversely, performing a chair pose or a wall squat has you hold the squat in a deep position without moving. Your muscles are still engaged and working against gravity, but they are stationary. A chair pose is an isometric exercise.
A plank is another great isometric exercise. If you’ve ever tried a plank you’ll likely agree that it is a challenging but awesome core exercise. Yet, you make no movement during a plank. Rather, your core muscles work against the force of gravity to hold you up and keep your spine in a straight line. Barre workouts often incorporate isometric exercises with other bodyweight moves, making them great total-body workouts to build strength and burn calories.
Related: A Beginner’s Guide to Barre Class
The Benefits of Isometric Exercise
Isometric exercises are beneficial to both the individual recovering from injury or dealing with chronic issues as well as the healthy, fit person looking to improve athletic performance and build strength.
I interviewed Physical Therapist Michelle Orefice-Thomsen and asked why she believes in using isometrics both with her physical therapy patients as well as in her fitness classes with healthy, fit people. She states, “Isometrics are extremely beneficial when incorporated into a complete strength and flexibility program. They help to overcome muscle imbalances while also improving body control, body awareness and core activation.” Let’s look further.
Isometrics for the INJURED
Isometrics are excellent for those who have experienced an injury and may not be able to perform certain movements for other reasons. Often holding an isometric is a great alternative. For instance, after an ankle sprain the first exercises given to build back strength in the ankle involve pressing the outside of your foot firmly against a chair for 20-30 seconds, then pressing the inside of the foot against a chair for 20-30 seconds. You’ll do this in all directions, slowly building up the muscle strength that surrounds the ankle. These isometrics use the force of the foot against the force of the chair to build muscle strength. Slowly but surely you’ll be back to using the ankle in other ways.
In addition, some who suffer from conditions like arthritis may find it painful to lift weight due to joint pain, but can tolerate holding a position in an isometric exercise. These type of moves work well for them.
Isometrics for the HEALTHY
Notice the physical therapist said that isometrics are good “…when incorporated into a complete strength and flexibility program.” Isometric exercises are always an excellent choice, but the truth is that isometric exercises alone will not improve speed or athletic performance. However, they will improve your strength and stabilization, especially when combined with dynamic movements. For example, perform 12-15 forward lunges, then HOLD a deep lunge position for 30 seconds and see what happens. Does the old phrase, “Feel the burn!” ring a bell? Combining dynamic and isometric exercises in the same workout is a powerful way to challenge those muscles!
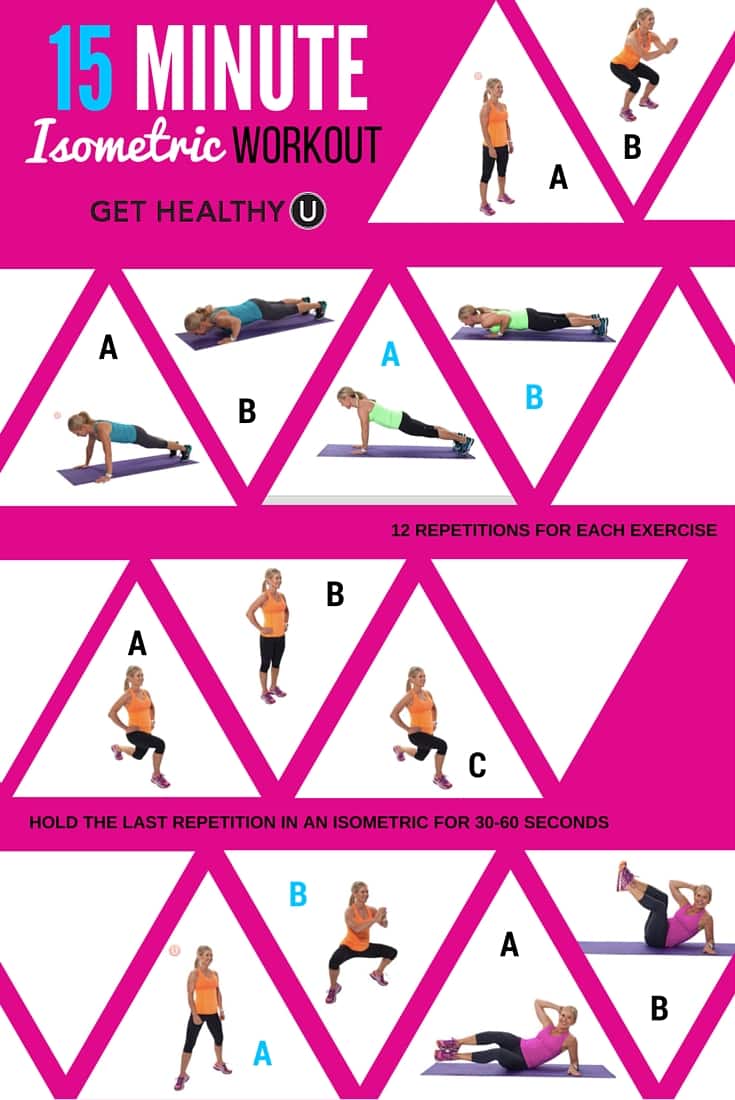
Your 15-Minute Isometric Workout
The following 15 minute workout combines dynamic exercises and isometric exercises for a total-body strength powerhouse! For each exercise below, perform the dynamic move for 12 repetitions, then hold the last repetition in an isometric for 30-60 seconds depending on your strength. This workout relies on body weight alone, so no equipment is needed!
Before performing these or any other isometric exercises keep these tips in mind:
- Form: Make sure you follow the proper form for each exercise to protect your joints.
- Breathe: Remember to continue inhaling and exhaling as you hold the isometric position. It’s easy to forget!
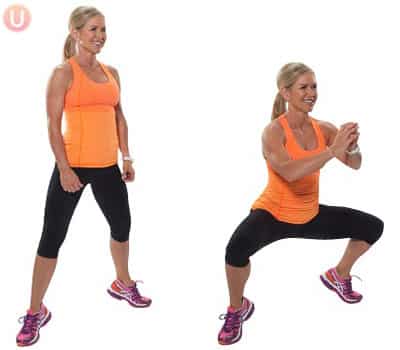
Squats To Chair Pose
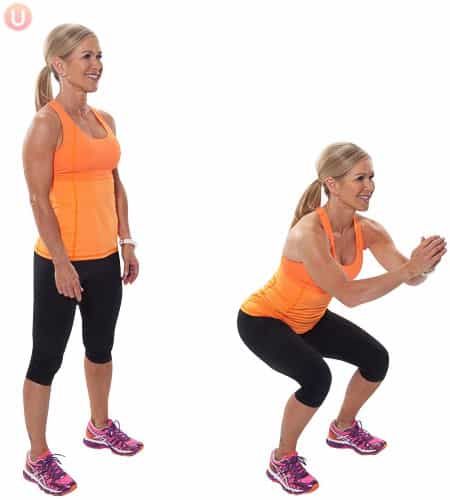 A) Stand tall with your feet hip-distance apart. Your hips, knees, and toes should all be facing forward.
B) Bend your knees and extend your buttocks backward as if you are going to sit back into a chair. Make sure that you keep your knees behind your toes and your weight in your heels. Rise back up and repeat 12 times.
C) On the last repetition, hold your squat at its lowest point for 30-60 seconds.
Push-Up To Plank Hold
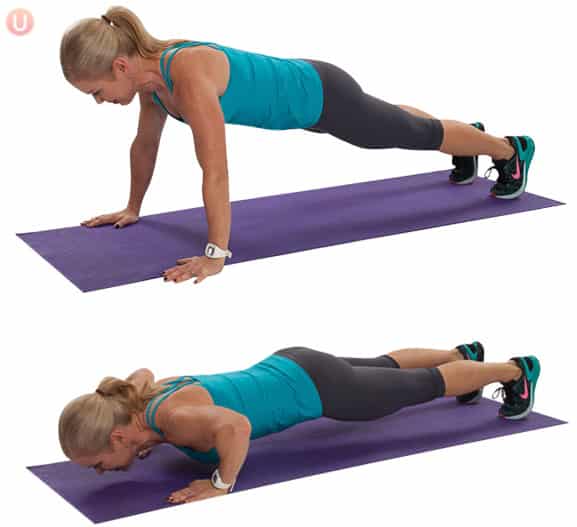
A) Begin in a plank position with hands below shoulders, legs long behind you, and body contracted to hold your spine in a straight line.
B) With elbows pointing slightly back, bend elbows and slowly begin to lower your body until you are just above the ground. Keep your gaze over your fingertips and body in a straight line.
C) As you exhale, tighten your belly and push yourself back up to a plank position. That is one repetition. Perform 12 repetitions.
D) On your last repetition hold your plank at the top, or if you are especially strong at the bottom, for 30-60 seconds.
Forward Lunges To Stationary Lunge Hold
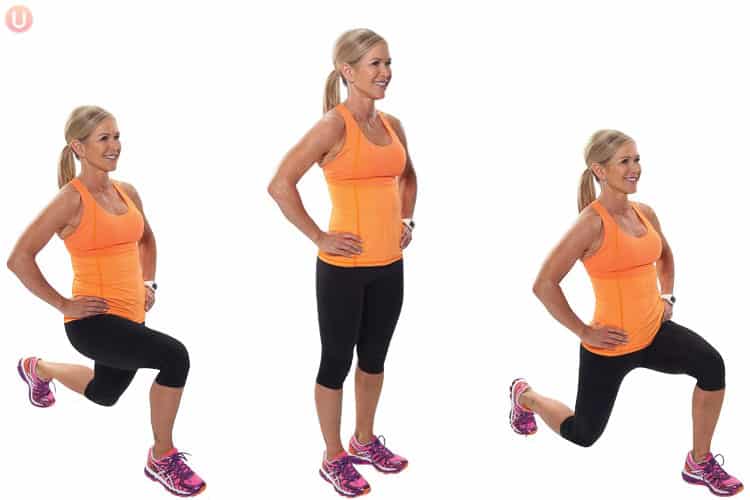 A) Stand tall with your feet hip-distance apart.
B) Take a large step forward and lower your body toward the floor. Both legs should be bent at a 90-degree angle at the bottom of the lunge. Push off front leg to rise back up to start, and repeat on the other side. Complete a total of 12 forward lunges.
C) On the last lunge, hold in a low position, with both knees at a 90-degree angle, for 30-60 seconds. Now switch to the other foot in front and hold again.
Chaturanga Push-Up To Tricep Hold
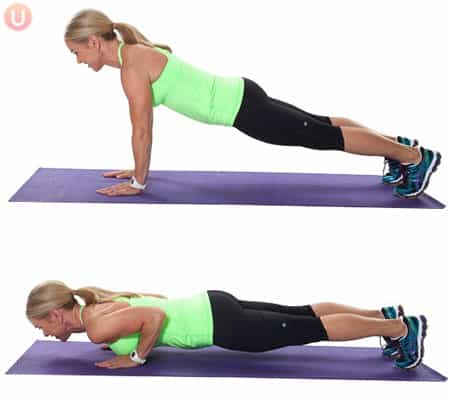 A) Start in plank position with your arms shoulder width apart. (You can modify by doing a kneeling plank if the full is to challenging). Engage your core and keep your abs tight.
B) Lower your chest to a hover above the mat while hugging your elbows in towards your side body and keep elbows pointing straight back. Press up by straightening arms and return to plank position. Perform 12 tricep push-ups.
C) After the last repetition, hold in the low position, hovering just above the floor with elbows close to your side, for 30-60 seconds.
Relevé-Plié To Plié Hold
A) Stand with feet slightly wider than shoulder distance apart, toes turned out, and lift your heels into releve.
B) Bend at the knees lowering body into a plié, keeping your back straight, and abs tight. Squeeze glutes and straighten legs to return to starting position. Perform 12 repetitions.
C) After the final repetition, hold in the lowest point of the plié for 30-60 seconds.
Oblique Crunch With Waistline Hold
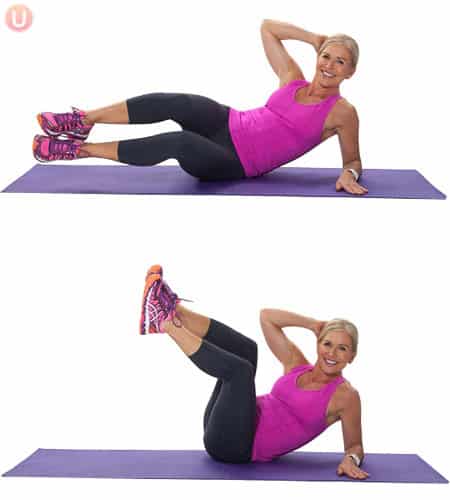 A) Begin by lying on your side, forearm down, knees slightly bent.
B) Roll slightly back onto your glute, like you’re sitting on the back pocket of your blue jeans and lift legs a few inches off the mat. Bring top hand behind the head so elbow is also bent.
C) Lift legs up, bringing your knees to your elbow while at the same time crunching your elbow toward your knee. Squeeze your obliques with each lift. Perform 12 repetitions.
D) On the last repetition, hold legs at their highest point, pulling the abs in tight for 30-60 seconds. Switch sides and repeat.
Try this workout 2-3 times a week for a great way to build strength and stability!
Want to save this workout? #PinItForLater!


I was just wondering if it is able to perform these exercises 5 times per week without reducing the intensity?