This post contains affiliate links. Please see our disclosure policy.
Are you ready to see some change from your strength training routine? Resistance bands might be just what you need to shake up your routine and start seeing results.
Too often we get stuck in the rut of doing the same thing day after day. The pattern becomes familiar so it’s easy to stick with it.
In addition, if you never change your workout, you don’t have to spend a lot of time thinking about what you’re going to do. Mindless activity never bodes well when it comes to real results. After all, our bodies respond to change!
To continue to see results from our work we have to keep changing it. So how about changing your equipment?
Put down the dumbbells and try these seven resistance band moves to tone your whole body. There are countless benefits of resistance bands, and with the right strategy you can transform your workout routine!
Before we get started on the work, let’s take a closer look at what resistance bands are all about.
Save This Article To Read Later
Table of Contents
RESISTANCE BAND COLOR CODE
When you pick up a set of hand weights it’s pretty easy to know what you’re getting. After all, the weight of the dumbbell is written right there on top! When it comes to resistance bands, however, it’s a different story. And while there are a variety of different brands available, most of the popular manufacturers color code their resistance levels this way:
Yellow: Extra Light – (Beginner)
Green: Light – (Beginner/Intermediate)
Red: Medium – (Intermediate/Advanced)
Blue: Heavy – (Advanced)
If for some reason the brand you choose doesn’t seem to fit this pattern, just keep in mind this one simple principle: the thicker the band, the heavier the resistance. Because of this, you may even want to use two different colored bands during your own workout. You’ll want something thicker for lower body since your legs are stronger and something thinner when doing upper body work, especially shoulders. In addition, the taller you are and the longer your limbs the more resistance you will naturally have. In other words, if you if you are 5’10”, a green band will be more challenging for you than it will be for me at 5’3″.
BENEFITS OF RESISTANCE BANDS
- They add variety. With weights, you’re limited to a fixed motion. The band allows you to change the position of your joints and work in multiple ways.
- They’re portable. Throw them in your gym bag, carry them to a friend’s, or slide them into your suitcase. The band allows you to strength train any time and anywhere.
- They fit all fitness levels. Beginners choose a lighter band and more basic exercises. Advance exercisers choose a tighter band and do more multi-joint moves such as a squat-overhead press or lunge with mid-back pull. The band can be either challenging or forgiving depending on how you use them.
- They’re affordable. Most bands will cost you $20 or less. Where can you get one? SPRI.com, Amazon, Target, Wal Mart, Dicks Sporting Goods…you get the picture. They are everywhere.
- They increase coordination. The time under tension for your muscles includes stabilizing your body. This teaches core strength and coordination.
FITTING RESISTANCE BANDS INTO YOUR ROUTINE
“So I have to give up my dumbbells cold turkey?” Absolutely not! This isn’t an “either-or” situation. There’s room in your exercise life for multiple pieces or equipment. Here are just a few ways to think about using resistance bands.
BANDS IN THE MIX
Pull in a resistance band and use it alongside your weights. Start with dumbbell squats, then add mid-back pull with the resistance band followed by dumbbell lunges and finish with resistance band outer thigh press. You get the picture. The band is just another tool in the mix.
BANDS TO SUPERSET
Bands can be an effective way to zero in a a particular muscle group by supersetting. How? Do 2 or 3 exercises on the same muscle group and change up your equipment. Example:
Dumbbell Bicep Curls followed by Resistance Band Alternating Bicep Curls. You can do this pattern for every muscle group!
BANDS ALONE
Yes! You can use bands as your only method of strength training. They’re light, easy to take along and inexpensive. There are plenty of full body workouts available and even some that will give you a little cardio to boot! In fact, at GHU we have a band exercise for every muscle group you have and this workout is a great way to get started!
So get yourself a band and let’s go. For each of the following exercises, perform 8-12 repetitions. If the last two repetitions are not hard, you may need to get a thicker band, but if you are unable to do a slow, full range-of-motion your band may be too tight. Once completed, move directly to the next exercise without rest. If you want a killer workout, go through the entire list twice!
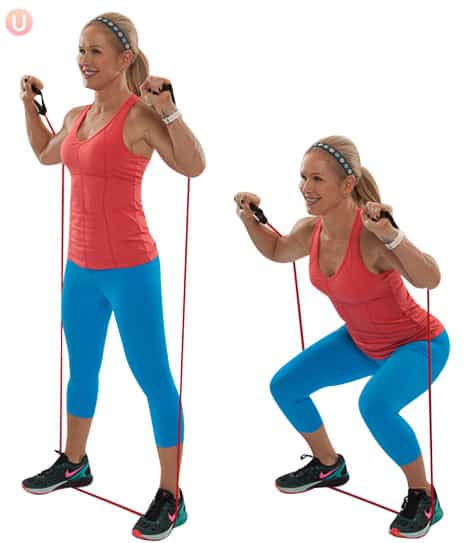
A) Stand on band with feet shoulder width apart and hold the handles next to your shoulders so the band is behind the back of your arms.
B) Slowly sit down and back into squat position keeping abdominals tight and chest lifted.
C) Press back up through heels, squeezing glutes.
Targets: legs, glutes
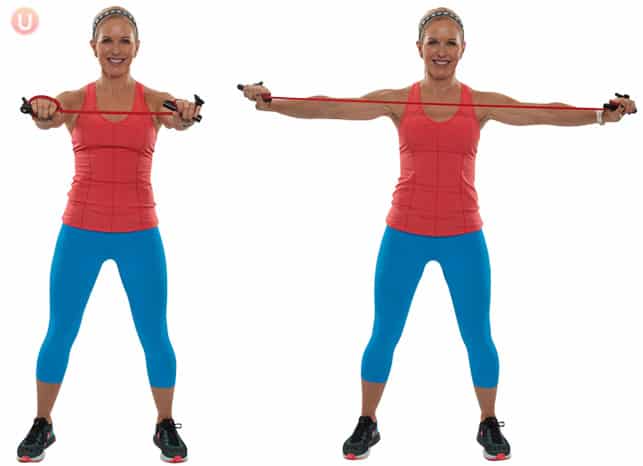
A) Standing with feet shoulder width apart, grab the handles of the band with each hand, then loop the band once or twice more around each hand to desired tightness.
B) Holding hands straight out in front of you at shoulder height, pull the band open as arms go out to the sides and band comes in towards chest. Keep shoulders down.
C) Slowly release hands back to start position and repeat.
Targets: back, shoulders
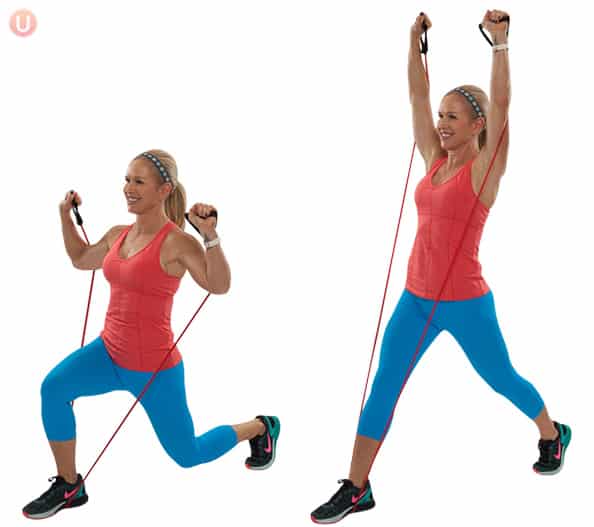
A) Place right foot on the center of the band on the floor and hold handles next to shoulders.
B) Step your left foot behind you, keeping your heel off the ground.
C) Lower toward the ground, bending both knees to a 90 degree angle.
D) Slowly press back up. Repeat for desired number of reps and switch legs.
Targets: legs, glutes
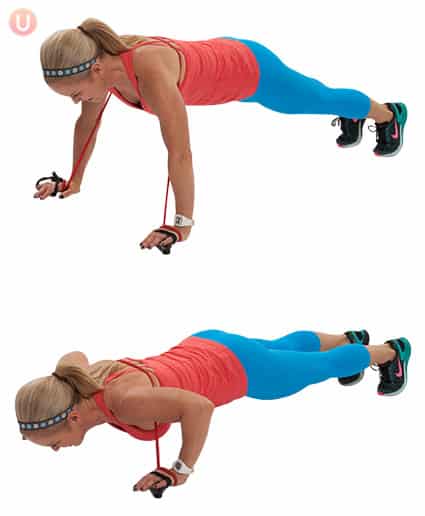
A) Wrap band around back just under armpits, while holding handles, loop the band and extra time around each hand to tighten it.
B) Kneel down placing handles against the floor then extend legs long until you are in a plank position.
C) Slowly lower chest to floor keeping body long. Press back up until arms are long. Repeat.
Targets: chest, arms, back, core
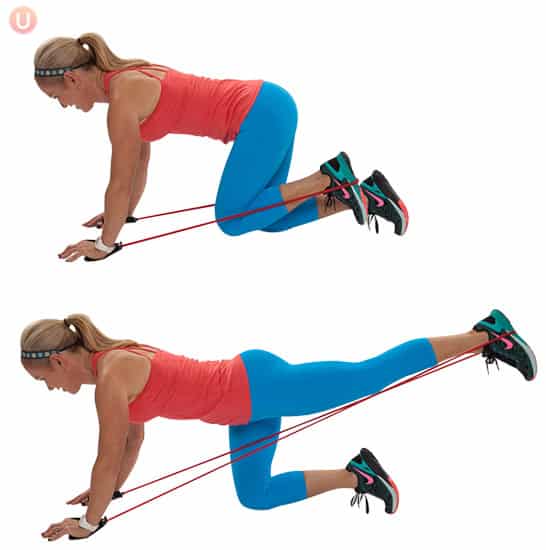
A) Kneel on floor and wrap band under right foot, and place hands down under shoulders holding handles against the floor.
B) Lift right knee off the floor slightly and push right foot back to extend leg straight against the band, squeezing your glute.
C) Release slowly bringing knee back in to a bent position. Continue for 8-12 reps and switch feet.
Targets: glutes
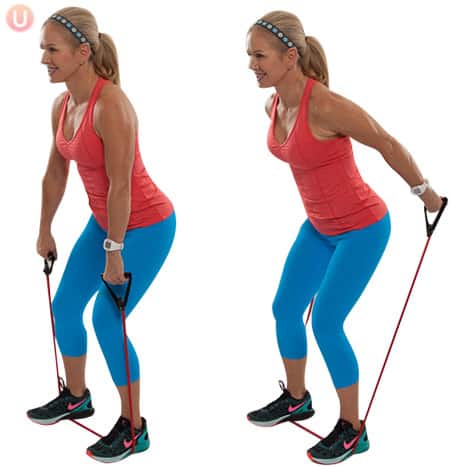
A) Stand both feet on band hip width apart and hold handles with palms facing behind you and arms long next to your sides.
B) Bend slightly at the knees and hinge forward keeping abs tight.
C) Press arms straight back as far as you can keeping shoulders down.
D) Release arms forward slowly.
Targets: tricep, shoulder, back
Note: For a similar tricep burn, you can also try the resistance band tricep extension.
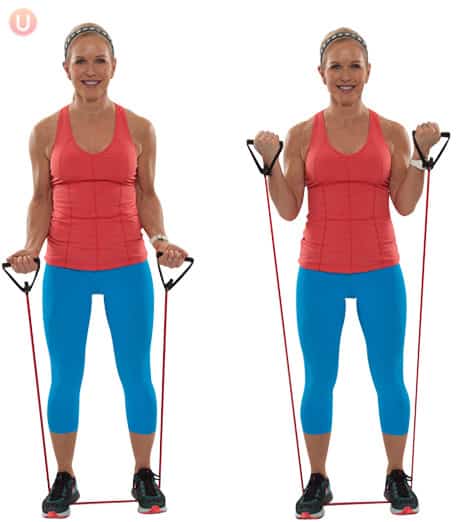
A) Stand with both feet on resistance band holding handles long next to your sides with palms facing forward.
B) Slowly curl hands up to shoulders, squeezing biceps and keeping elbows next to your sides.
C) Slowly release arms back down to starting position.
Targets: biceps


I want to buy a band body workout
This sounds awesome! I want to do it.
Hello! Thank you for this informative and useful article. I found you at the recommendation of my last physical therapist. Great information and website. I was always a gym rat. Once the pandemic hit!!! I freaked out, then I said I’m gonna start using resistance bands!!! And now I’m hooked. Love them and I will never return to the gym again. BTW I’m in better shape now than I was when I was lifting weights in the gym. RESISTANCE BANDS RULE!!
how can i get one
Hi Stephanie – I like to use SPRI resistance bands. Here is a link for the resistance bands I prefer to use: https://www.spri.com/collections/exercise-tubing/products/the-original-xertube
They are called Xertube!